
Table of contents
- Setup, Installation and Troubleshooting of D-link DAP1325 Wifi Extender
- Connecting to the computer
- D-link DAP1325 Installation
- D-link DAP1325 setup
- WPS PBC
- QRS Mobile App Installation
- Configuration through the Setup wizard
- Connecting Via WPS
- Connecting to the internet-based interface
- Troubleshooting tips for D-link Dap 1325
- Conclusion
Setup, Installation and Troubleshooting of D-link DAP1325 Wifi Extender
Dlink DAP1325 allows you to expand a secure wireless network. It is equipped with the most recent wireless technology. It can offer a wireless connection of up to 300 Mbps. To login to the web-based utility of the extender, use http://dlinkap.local. Before doing that you must set up Dlink DAP1325. We will now discuss the extender in more detail. Some prerequisites before moving forward.
- An operating system.
- The web browser
- Wireless NIC or wired
- Wireless
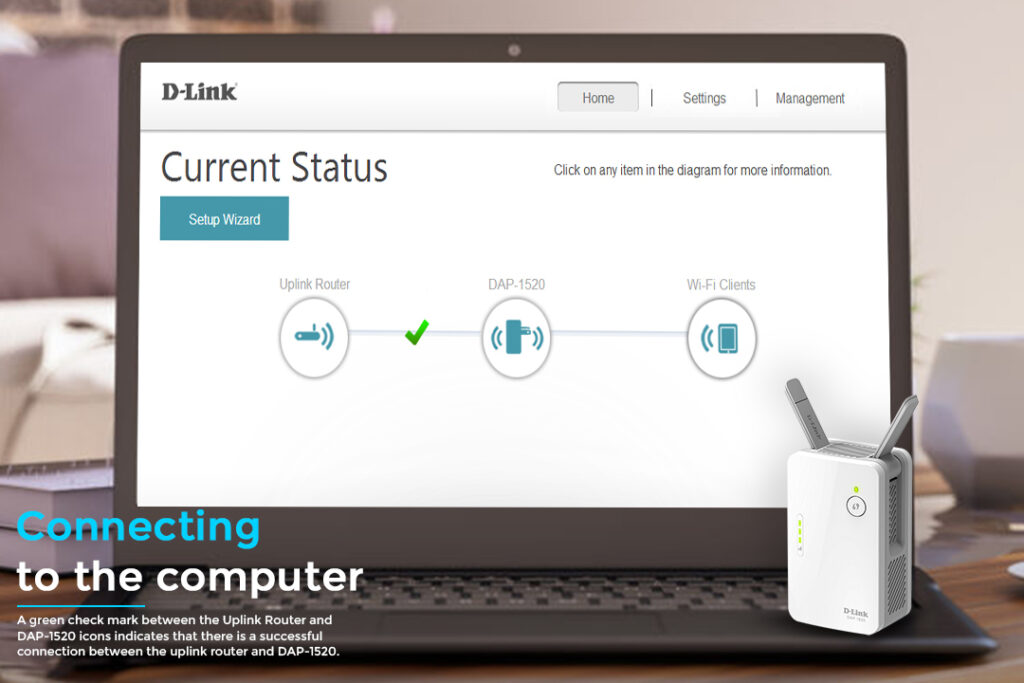
Connecting to the computer
- An ethernet adapter for a PC. Use an Ethernet cable to connect the extender and the computer. Connect the device to an electrical outlet.
- Configure an IP address to connect to the Ethernet adapter on the PC.
- The wifi adapter can be used with a PC.
- Connect the device with an electrical outlet.
- Turn on the wifi.
D-link DAP1325 Installation
- The DAP-1325 can be placed in any area where you wish to expand your wifi network.
- Before plugging in an extender, move the antennas up.
- Plug the extender into a power outlet. The WPS/status LED will illuminate immediately to indicate that the device has started up.
D-link DAP1325 setup
To set up your DAP-13235, you can use multiple configuration tools discussed below.
WPS PBC
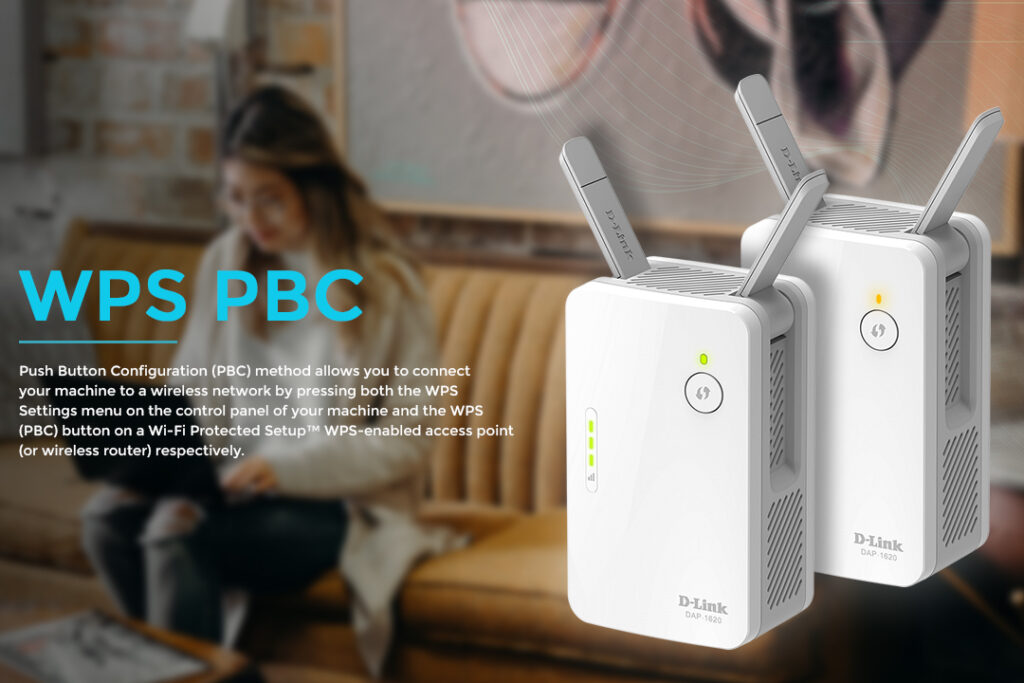
- Once the WPS/status LED blinks amber, the device is all set to connect to an Uplink Network.
- Both the access point and source wireless router should be pushed to activate the WPS button. The status/WPS LED will start to blink green. This process may take up to 2 minutes.
- The Status/WPS LED will turn solid green once the extender has successfully connected to the uplink wireless network. The extended network’s name will be Source-EXT.
- The password for the extended network will be the same one as for the source network.
QRS Mobile App Installation
You can set up the extender from any smartphone, including Android and iPhones, by using the QRS mobile application. Follow these steps to set it up.
- You can find the QRS App on your phone.
- The moment the app is installed, you can configure the extender.
- You can connect wirelessly to the router by opening your wireless utility app on your smartphone. The supplied configuration card will list the wifi name. Enter the password and select it.
- Once the extender is connected wirelessly, launch the QRS app on your home screen.
- To continue, click Start.
- QRS mobile app detects extenders and scans for available wifi networks. Select the network you wish to extend. If your network does not appear the first time, tap Rescan.
- Enter the password to access the network. To continue, click on Next.
- Enter the network name SSID along with the password to create an extended wifi network. Continue by clicking Next
- For the web-based configuration tool of the extender, create an administrator password. Continue by clicking Next
- The settings summary will be displayed. To save the settings and reboot your device, click on the Save button.
- Once the process is completed, you will see a screen where you can modify the settings of your mobile device or laptop WiFi to the wireless network name/password you have just created.
Configuration through the Setup wizard
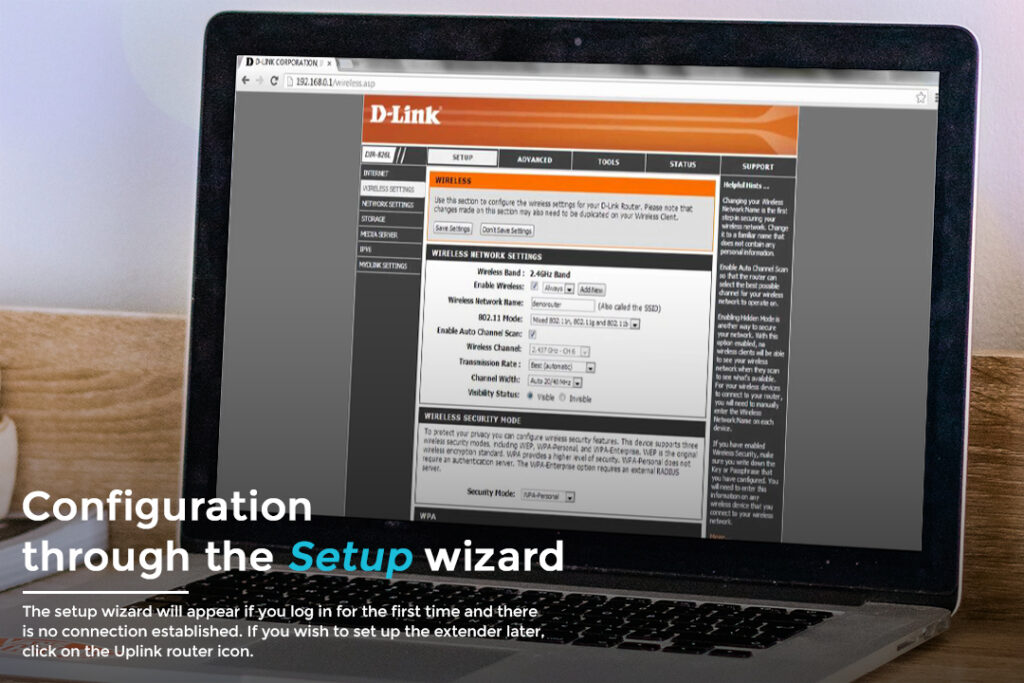
The setup wizard will appear if you log in for the first time and there is no connection established. If you wish to set up the extender later, click on the Uplink router icon. This wizard will guide you through the steps to set up your extender to connect to the internet and extend your wireless network. Follow these steps.
- Connect the device.
- Configure the settings.
- Create a password.
- To begin, click Next.
Connecting via WPS
The extender will initiate a WPS/PBC search to locate an uplink network. If your device has a virtual or physical WPS button, you can press it or enable it within the 120 second time limit. You can choose to not use WPS, or if the device doesn’t have one, you can select another configuration option like Extending an existing wireless network or adding wireless connectivity to your wired network. After the WPS connection has been established successfully, you will be asked to set up the extension network settings. You will see the current network name and password. If the WPS countdown expires without establishing a connection to the uplink wireless network, you can click the retry button.
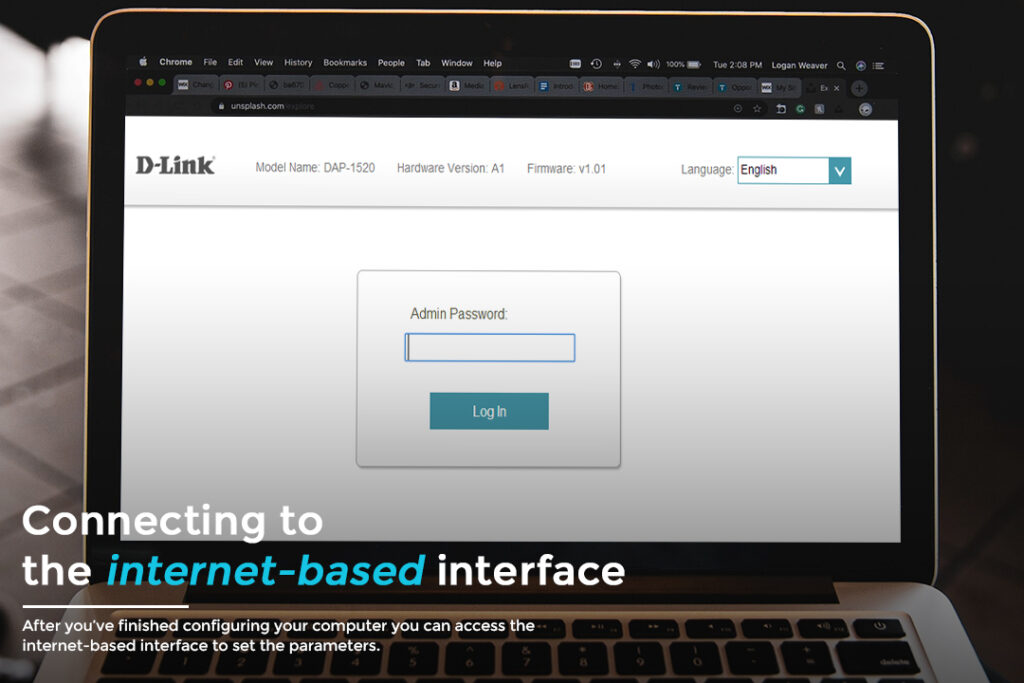
Connecting to the internet-based interface
After you’ve finished configuring your computer you can access the internet-based interface to set the parameters.
- Use any compatible web browser.
- You can either enter the IP address or enter http://dlinkap.local into the address bar and hit the enter key.
- The initial configuration is available if the device was not configured before or if the settings have been reset after accessing the web-based interface.
- If you have already set up the device, the login page will open.
- Enter the username and password you previously used in the password field.
- Click the Login button and access the control panel.
Troubleshooting tips for D-link Dap 1325
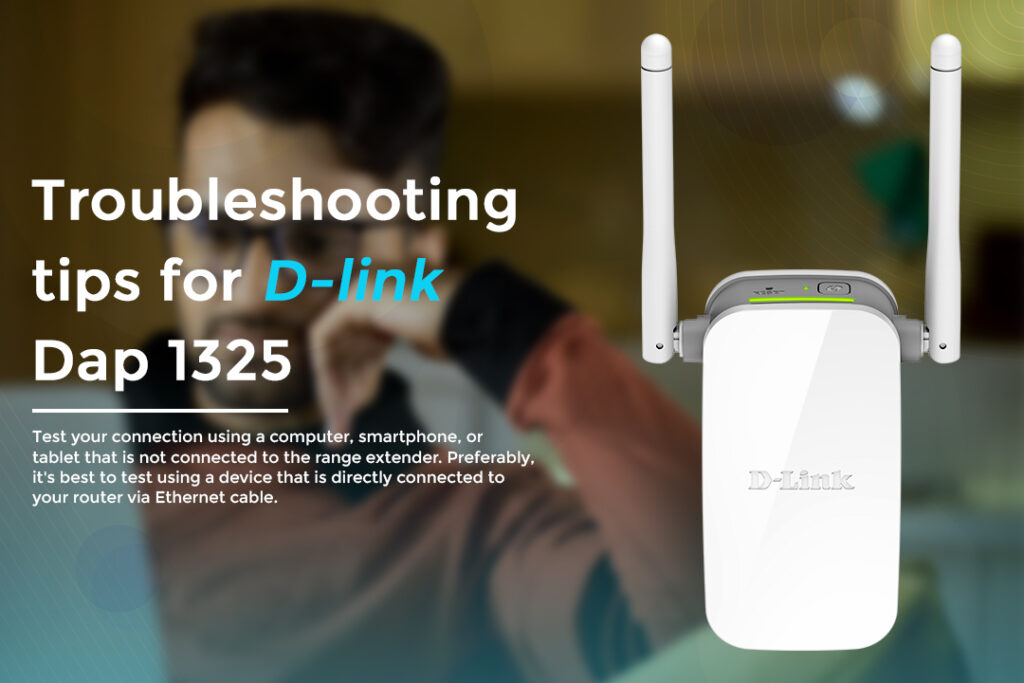
Dlink Dap1325 not working? Don’t worry, you can try the following troubleshooting tips.
- The IP address of your computer and of the web interface should be the same.
- Keep the browser updated always.
- Ensure that you are connected to an identical wireless network as your extender base
- Disable internet security software that may be blocking access to the configuration page.
- Verify that the internet connection is working. It should work smoothly.
- You must enter the correct login credentials.
Conclusion
There are numerous ways to set up D-Link DAP-1325. If you have any queries about the setup, reach out to our team of experts for help.