
D-link DAP1650 Setup
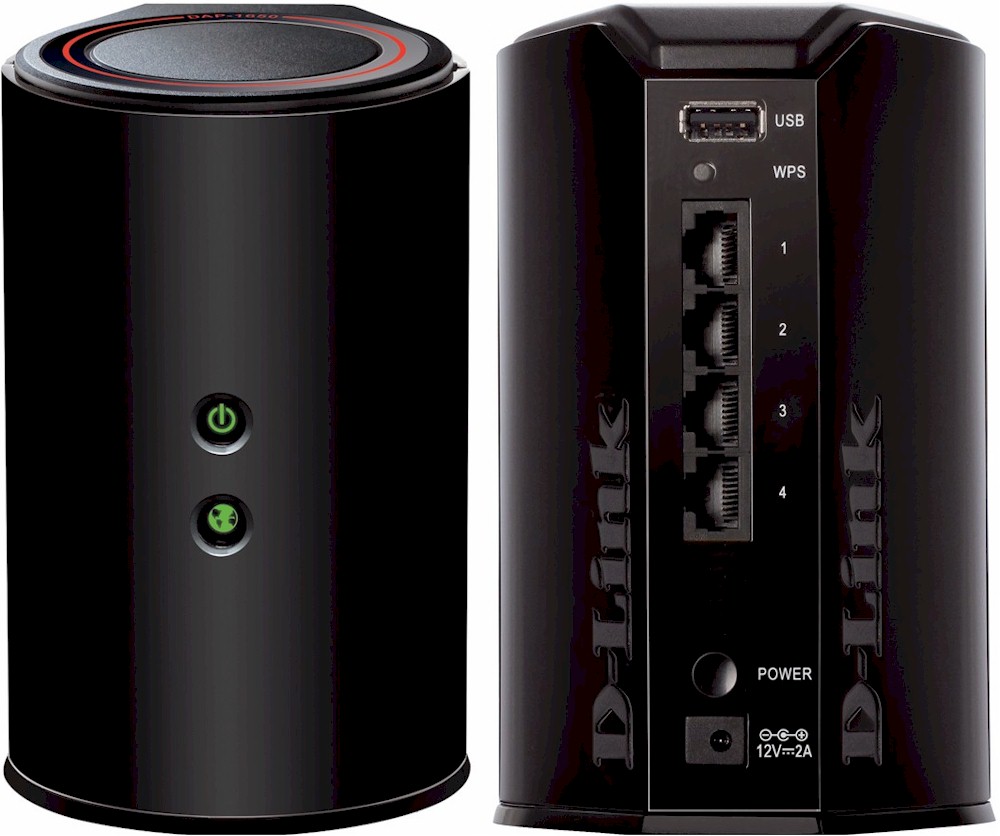
The D-Link DAP 1650 extender is an ideal solution for improving the coverage and signal strength of your wireless network. So, if you have recently purchased and wondering how to set up a D-Link DAP 1650 WiFi extender, you can refer to this guide and get your answer.
- A Wi-Fi router
- A computer or Smartphone for a standard setup process
- Wi-Fi name and password of your wireless network
How to set up a D-Link DAP1650 Wi-Fi extender?
- Power up d-link dap 1650 extender after connecting it to the electrical outlet.
- Connect a computer to the dlink extender using an Ethernet cable.
- You can also connect to the dlink network using the default wifi credentials.
- Open an internet browser and enter the default web address dlinkap.local or default ip address 192.168.0.50 into the address bar.
- This will take you to the dlink dap 1650 login page asking you to fill in the username and password.
- You should be taken to the d’link dap 1650 setup wizard, click on ‘Next’ to begin the configuration.
- The setup wizard will allow you to choose the mode of dlink dap 1650 device. Select ‘Extender’ mode and click on the ‘Next’ option
- Next, the setup wizard will display a list of all the available wireless networks nearby to your dlink extender.
- From the list, select your router network and enter its Wi-Fi password to connect to its network.
- Create a wireless network name and password to your newly created dlink extender network.
- Review your settings and click on ‘Finish’ to complete the process.
The dlink dap 1650 extender setup is now completed.
DLink DAP1650 Firmware Update
To update the dlink Dap 1650 extender, you would need to visit the dlink support website and download the latest firmware file for your device. You need to enter the model number of your device and download the latest firmware. Next, you need to sign into dlinkap.local setup wizard. Under the ‘Admin’ tab, you can update the downloaded firmware file.
If you have more questions regarding d’link dap 1650 setup, you can get in touch with our team of experts and get their help.
Instructions for the D-link DAP1650 wifi extender Firmware update
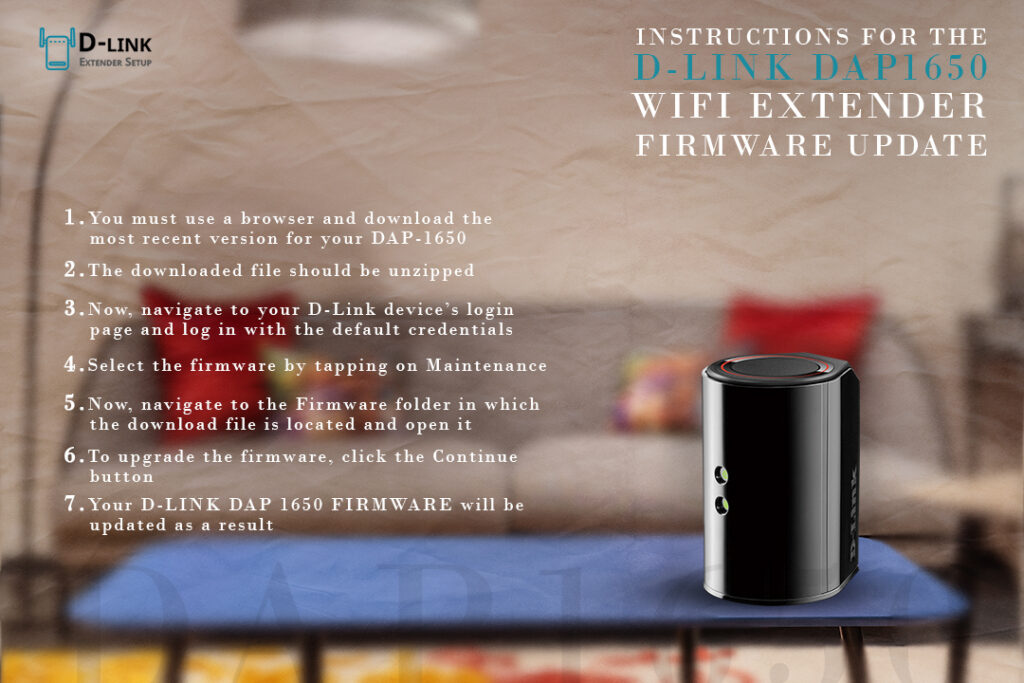
Whether you’re having problems with the performance of your D-Link device, see if you need to update the D-LINK DAP1650 Firmware. You can simply upgrade the firmware on your device by following the procedure below.
- You must use a browser and download the most recent version for your DAP-1650.
- The downloaded file should be unzipped.
- Now, navigate to your D-Link device’s login page and log in with the default credentials.
- Select the firmware by tapping on Maintenance.
- Now, navigate to the Firmware folder in which the download file is located and open it.
- To upgrade the firmware, click the Continue button.
- Your D-LINK DAP 1650 FIRMWARE will be updated as a result.
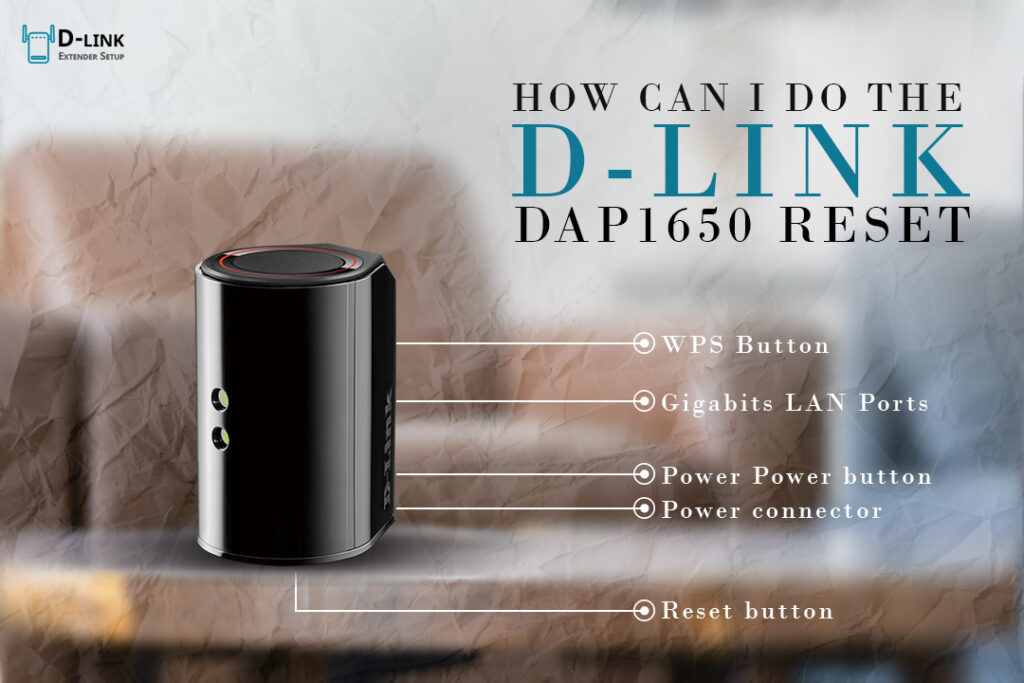
How can I do the D-link DAP1650 reset?
Do you need help configuring your D-link DAP1650 wifi extender? It’s nothing to be concerned about. Reverting to the factory default version is an easy repair. For further information, follow the procedures outlined below.
- To begin the process of resetting your extender, locate the reset button on the device’s rear.
- Then, with a paper pin or a pen, press the reset button.
- Now, push and hold the button for 10-15 seconds before releasing it when the LED light blinks.
- Your device will restart, with the factory default version restored.
- For best performance, you must configure your device based on your requirements.
- Follow the procedures mentioned above to configure your device.
Conclusion
The information provided here will be quite useful while performing the d link dap 1650 setup and updating the firmware. During the setup, you may encounter several frequent difficulties. However, these difficulties are readily remedied by following a few easy procedures outlined in the setup instructions. Contact us for additional information, and we will gladly help you with all of your questions.